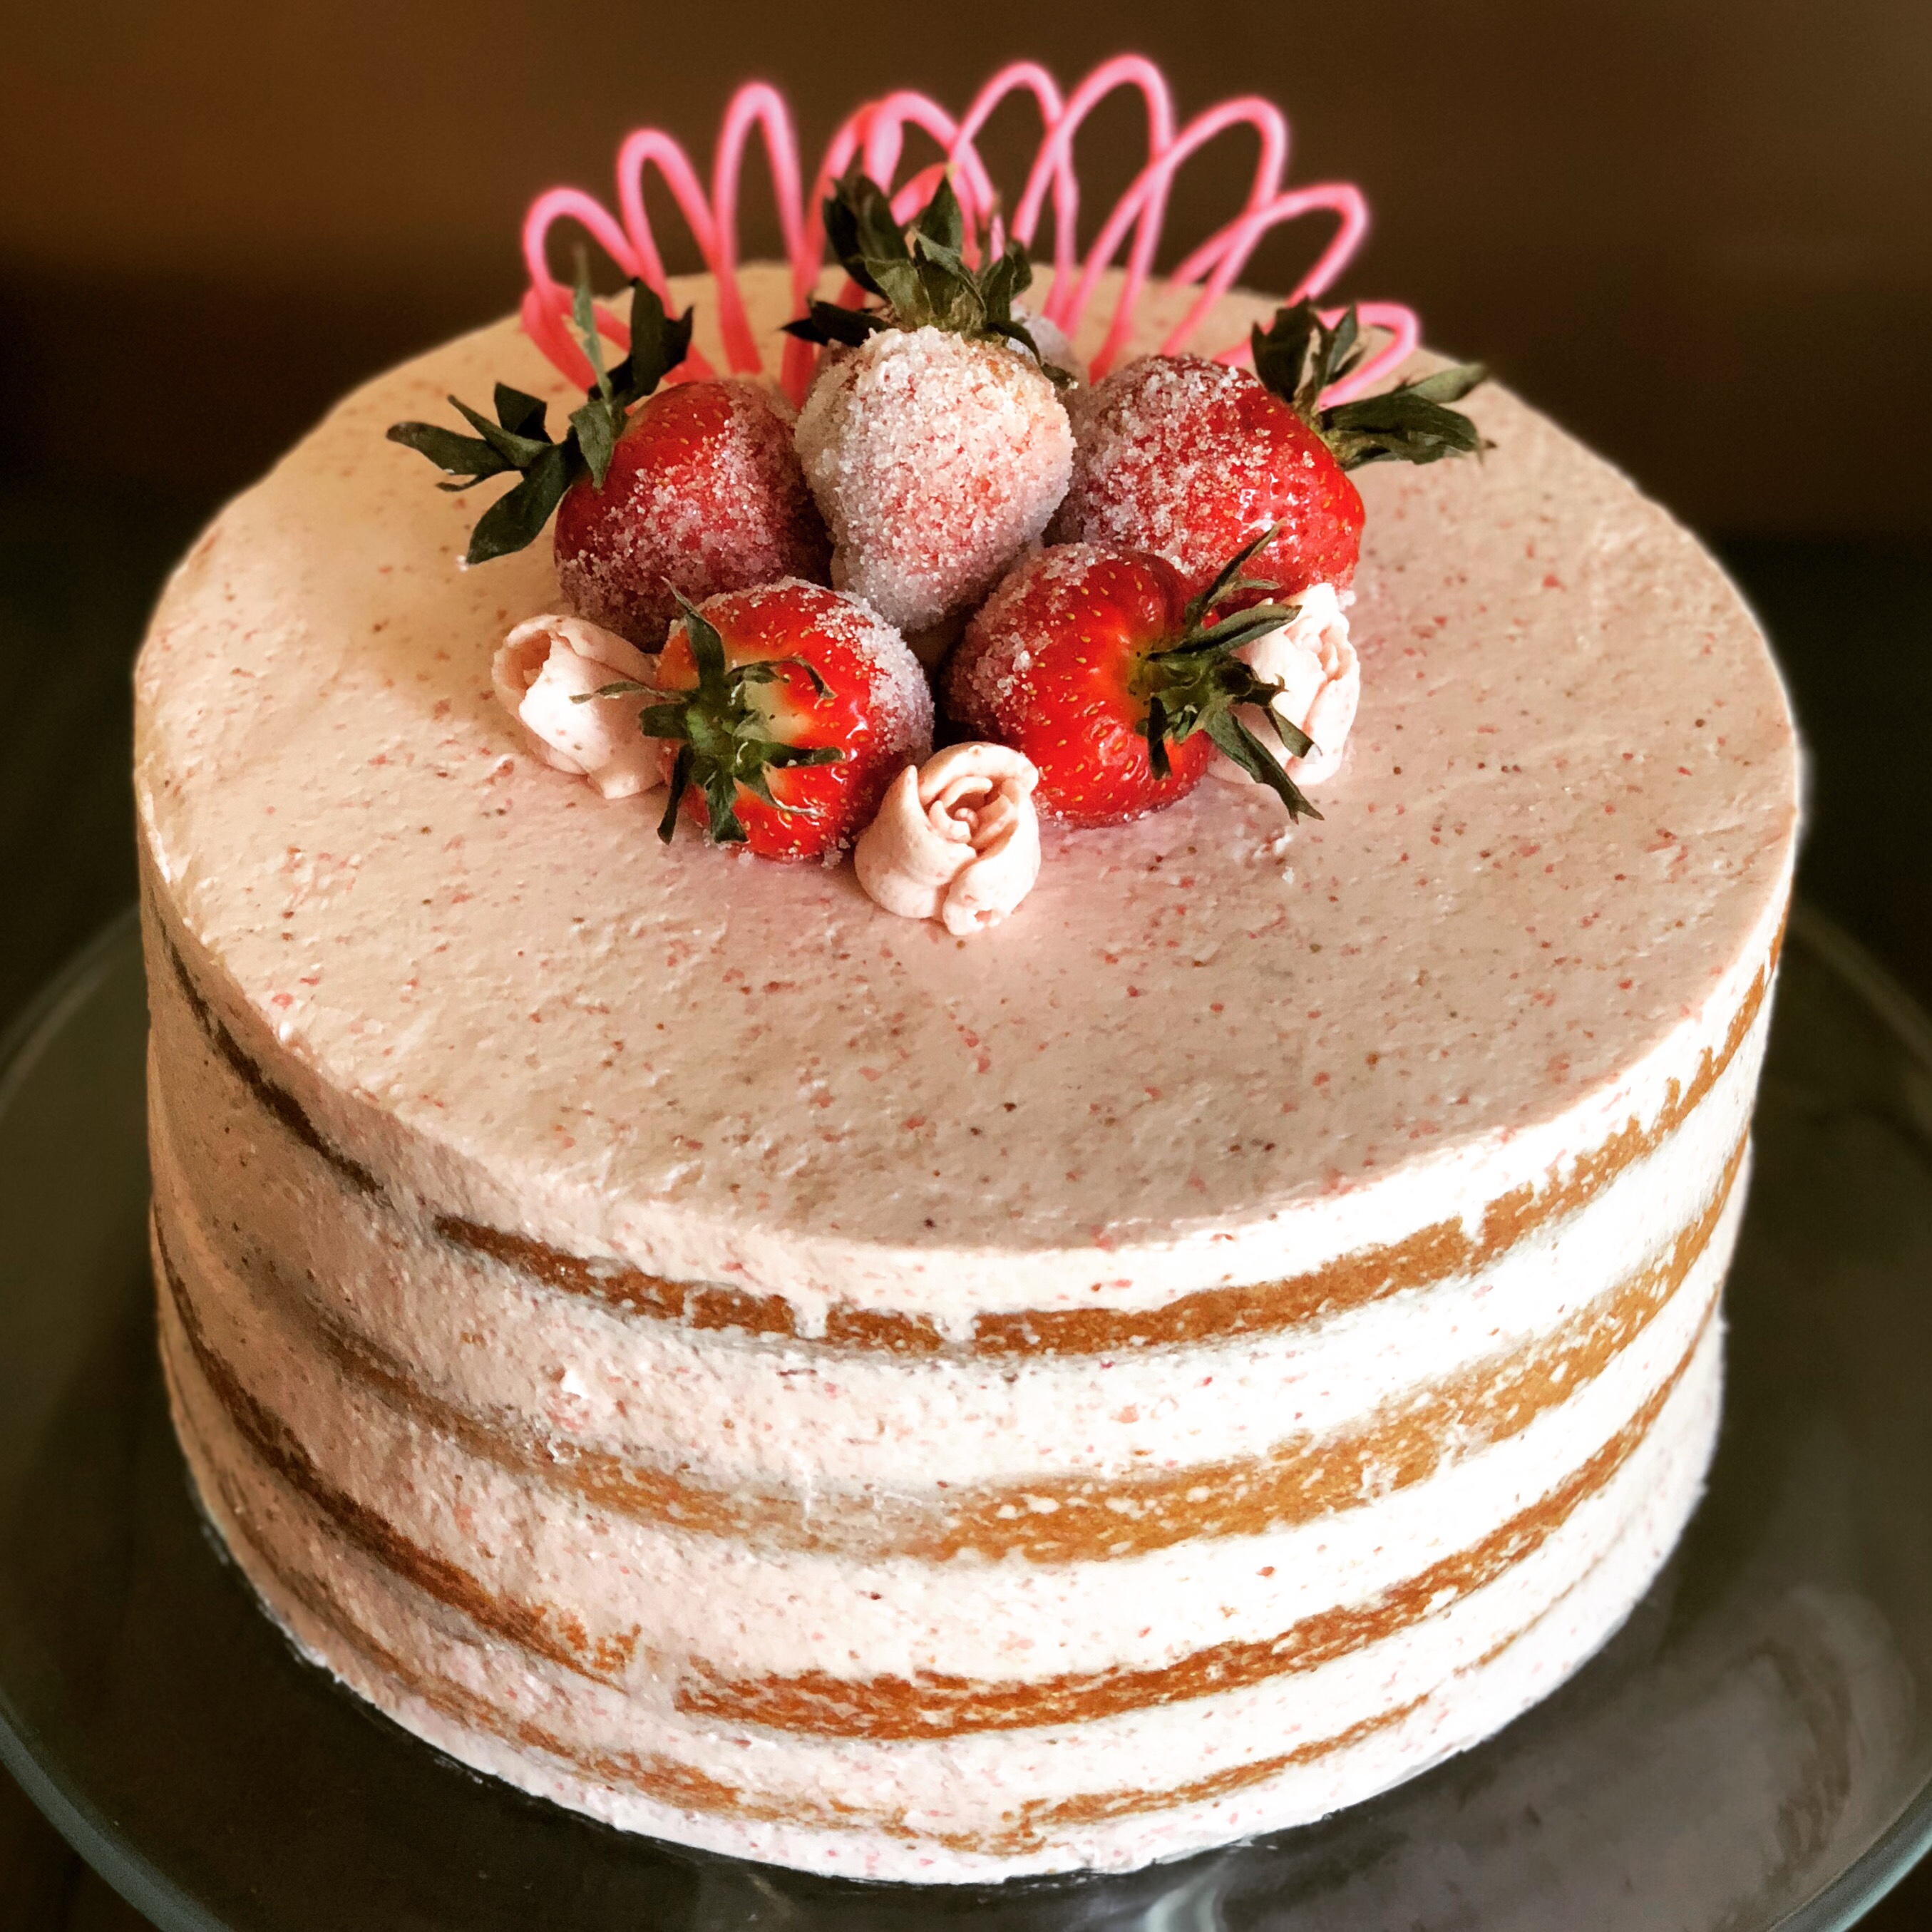
Centerpiece alert! This Vanilla Cake with Real Strawberry Swiss Meringue Buttercream is the show-stopper you’ve been searching for.
I made this cake the first time for a 40th wedding anniversary, but since then, it’s become a Mother’s Day staple. I make my vanilla cake from scratch, but you could use a boxed cake mix to cut down on the time, if really must.
The buttercream is the real superstar here. It’s a Swiss Meringue Buttercream, which sounds a lot more difficult than it really is. It’s smooooooth, not cloyingly sweet at all, and incredibly versatile.
I like to build my cake with at least 3 layers, each sandwiched with the strawberry buttercream, and then leave the sides a little bare, for the ‘naked cake’ look – but you can frost the sides entirely if you prefer.
Everyone will go crazy for this delicious cake!
Tips for Making Vanilla Cake with Real Strawberry Swiss Meringue Buttercream
The Cake Flour
Don’t skip or replace the cake flour here. DIY methods and substitution hacks simply do not work. All-purpose flour will make the cake heavier, not light and fluffy, so it’s worth the extra trip to the store if you don’t have real cake flour on hand. I like Swans Down brand, but any brand should work just fine.
The Buttermilk
As above, don’t substitute the buttermilk. DIY buttermilk substitutions don’t work either. I haven’t tried using powdered buttermilk, but honestly, if you’re going to put a ton of time and effort into a homemade cake, it’s really worth the extra trip to the store to grab real buttermilk, too, for the best taste and texture possible.
If you absolutely can’t find buttermilk where you live, try unflavored kefir or plain full-fat yogurt instead.
And if you have struggled with dry cakes in the past, check out my How to Prevent Dry Cake post here!
Can I Use Pasteurized Egg Whites?
I have successfully made Swiss Meringue Buttercream using bottled, pasteurized egg whites. Just note that they may not froth up the same way, as they’re not designed to hold shape for purposes such as this, so for best results, use real eggs. Separate your eggs while cold, and then bring to room temperature before starting the buttercream.
Please note, if you’re looking to use pasteurized egg whites so they’re safe for consumption, there’s no need here, as we’re cooking the eggs to 160°F / 71°C. Eggs are safe for consumption after hitting that temp.
Can I Halve This Buttercream? Can I Double This Buttercream?
Yes, you can halve or double the Swiss Meringue Buttercream recipe – just stick to the proportions exactly, and follow the same directions.
For this size cake, however, you will need the whole recipe amount in order to fill, ‘naked’ frost, and decorate the cake.
How to Decorate Cakes
Feel free to decorate your masterpiece cake however you like! You could fill the top with berries, use edible flowers, fondant decorations, or just add a purchased ‘Happy Birthday’ (or whatever the occasion) topper.
If you want to copy how I decorated my cake, here’s what I did:
- A few fresh, whole strawberries, which I sugared (learn how to sugar fruit here).
- Additional Strawberry Buttercream, piped through Russian piping tips for some added texture and elegance.
- Some melted pink candy melts, piped on parchment paper and allowed to set, then placed gently on a little mound of buttercream. This added a little more drama and height I wanted here.
More Celebratory Recipes You’ll Love:

Vanilla Cake with Real Strawberry Swiss Meringue Buttercream
Ingredients
Ingredients for Vanilla Cake:
- 440 grams cake flour, don't substitute or use DIY
- 1 teaspoon salt
- 1 teaspoon baking powder
- 3/4 teaspoon baking soda
- 345 grams unsalted butter, at room temperature
- 400 grams granulated sugar
- 3 large eggs + 2 additional egg whites, separated when cold and brought to room temperature
- 1 Tablespoon vanilla extract
- 360 ml real buttermilk, at room temperature (don't substitute)
Ingredients for Strawberry Swiss Meringue Buttercream:
- 177 grams egg whites
- 200 grams (1 cup) sugar
- 1/8 teaspoon salt
- 454 grams (1 lb) unsalted butter, at room temperature, cut into cubes
- 1-2 lbs strawberries (fresh or frozen and thawed), pureed until completely smooth. Feel free to push them through a fine mesh sieve if you don't like the little seeds.
Instructions
To Make the Cake:
- Preheat oven to 350°F / 175°C. Spray three 9-inch cake pans with cooking spray, and line the bottoms and sides with parchment paper. I like to do this by cutting a circle to fit each pan’s base, and then wrapping a separate, long piece inside each pan, to cover the sides.
- In a medium bowl, whisk together the cake flour, salt, baking powder, and baking soda. Set aside.
- In a large bowl, or the bowl of a stand mixer, beat the butter and sugar together until creamy, fluffy and pale – about 3 minutes. Scrape the sides and bottom of the bowl to ensure everything is mixed in.
- Add the eggs, egg whites, and vanilla extract and beat until combined. Scrape the bowl down.
- Add the dry ingredients and mix until just combined. Scrape the bowl down again.
- Add the buttermilk and mix just until combined. Scrape down as needed to ensure everything is mixed in, and there are no lumps.
- Pour batter evenly into cake pans. Bake in the preheated oven for around 22-26 minutes, or until a skewer inserted in the center comes out clean. Cool cakes completely, still in their pans, on a wire rack.
- Ensure your cakes are completely cooled before cutting and assembling.
- If you're not planning to assemble and decorate today, wrap each cooled cake layer in plastic wrap and store in the fridge for up to 2 days, or in the freezer for up to 1 month. It's even easier to frost cold cake!
To Make the Buttercream:
- In a medium saucepan, place about an inch of water and bring to a boil, then reduce to a simmer. In the bowl of your stand mixer (or a large metal mixing bowl that fits nicely over your saucepan), place the egg whites, sugar, and salt, and whisk a little to combine. Place the bowl over the pot of simmering water.
- Continue to lightly whisk, keeping the mixture moving, to prevent scrambling the eggs. Around 140°F / 60°C, the sugar will dissolve and the eggs will begin to froth and foam up. Once the mixture has reached 160°F / 71°C, remove the bowl and carefully wipe the bottom dry.
- Place the bowl on the stand mixer, fitted with the whisk attachment. Beat on high until stiff peaks form, and the outside of the bowl is completely cool to the touch. This usually takes me about 10 minutes. Ensure you have reached stiff peaks before proceeding to the next step.
- Swap out to a paddle attachment and add all your butter (ensure your butter is at room temperature – around 70°F / 21°C). Mix on the lowest setting on the mixer, until beautifully silky-smooth. This sometimes takes awhile. It may start to separate or look curdled, but just leave it alone and keep mixing on low – it will fix itself, I promise!
- Once you have light, fluffy, completely-smooth buttercream, you can add the pureed strawberries a little at a time, while the mixer is running on low. The buttercream may separate again, but it will come back together if you keep mixing on low. Keep adding more puree until the buttercream reaches your desired level of strawberry flavor.
To Assemble and Frost:
- If your cake layers are domed, use a large knife or a cake leveler to slice a thin layer off the top of each layer, to create a flat surface. Place a little frosting (for “glue”) on your cake board or cake stand, and place your first cake layer.
- Place a scoop of frosting on the first layer and spread evenly, to your desired thickness (I like to aim for about a 2:1 ratio of cake to frosting for the layers, since more frosting goes on top and on the sides – but you can do 1:1 or whatever you like!). This can be spooned or piped on, then spread evenly with a spatula or palette knife.
- Place your second cake layer on top and put the same amount of frosting on top, and smooth evenly.
- Repeat with the final layer. Place the remaining frosting in a piping bag, and ice the sides. Smooth gently with a large spatula, either scraping a good deal off as I did for the “naked cake” look, or simply smoothing out for an even finish, if you prefer to leave the cake iced. Videos are available on YouTube (such as this one) if you’re unsure of how to best ice a cake.
- Decorate as desired.
- Refrigerate cake for at least a few hours before slicing and serving, to help the cake hold its shape when cutting and ensuring nicely cut, pretty cake slices. Cover leftover cake and store in the refrigerator for up to 5 days.
Notes
- The base recipe for this buttercream can be used for any flavoring you desire! Instead of adding pureed strawberries, you can add any pureed fruit, liquors, melted and cooled chocolate, homemade Salted Caramel Sauce – you name it! It’s my absolute go-to buttercream recipe for any occasion.
- Be patient when adding the strawberry puree (or any liquid) – I once added WAY too much puree at once on the last step, and thought I ruined it! I left it on the mixer for probably half an hour before it came back together, but it did come back together, and was fluffy, smooth, and delicious!
- Pull your butter a couple hours before you wish to make the buttercream (or the night before). You need the butter to be soft enough that if you pick it up and squeeze with your fingers, it’s soft and pliable. If your butter is too cold, it will not emulsify with the meringue mixture correctly and may ruin the buttercream.
- Swiss Meringue Buttercream will keep for a week in an airtight container in the fridge. Just pull it out and let it come to room temperature, then re-beat on low again to refresh, before using. It may separate again, but it will come back together.


[…] my Swiss Meringue Buttercream recipe for a classic, delicious cupcake, or the frosting from my Strawberry Swiss Meringue Buttercream post for a fresh, addictive, summery […]