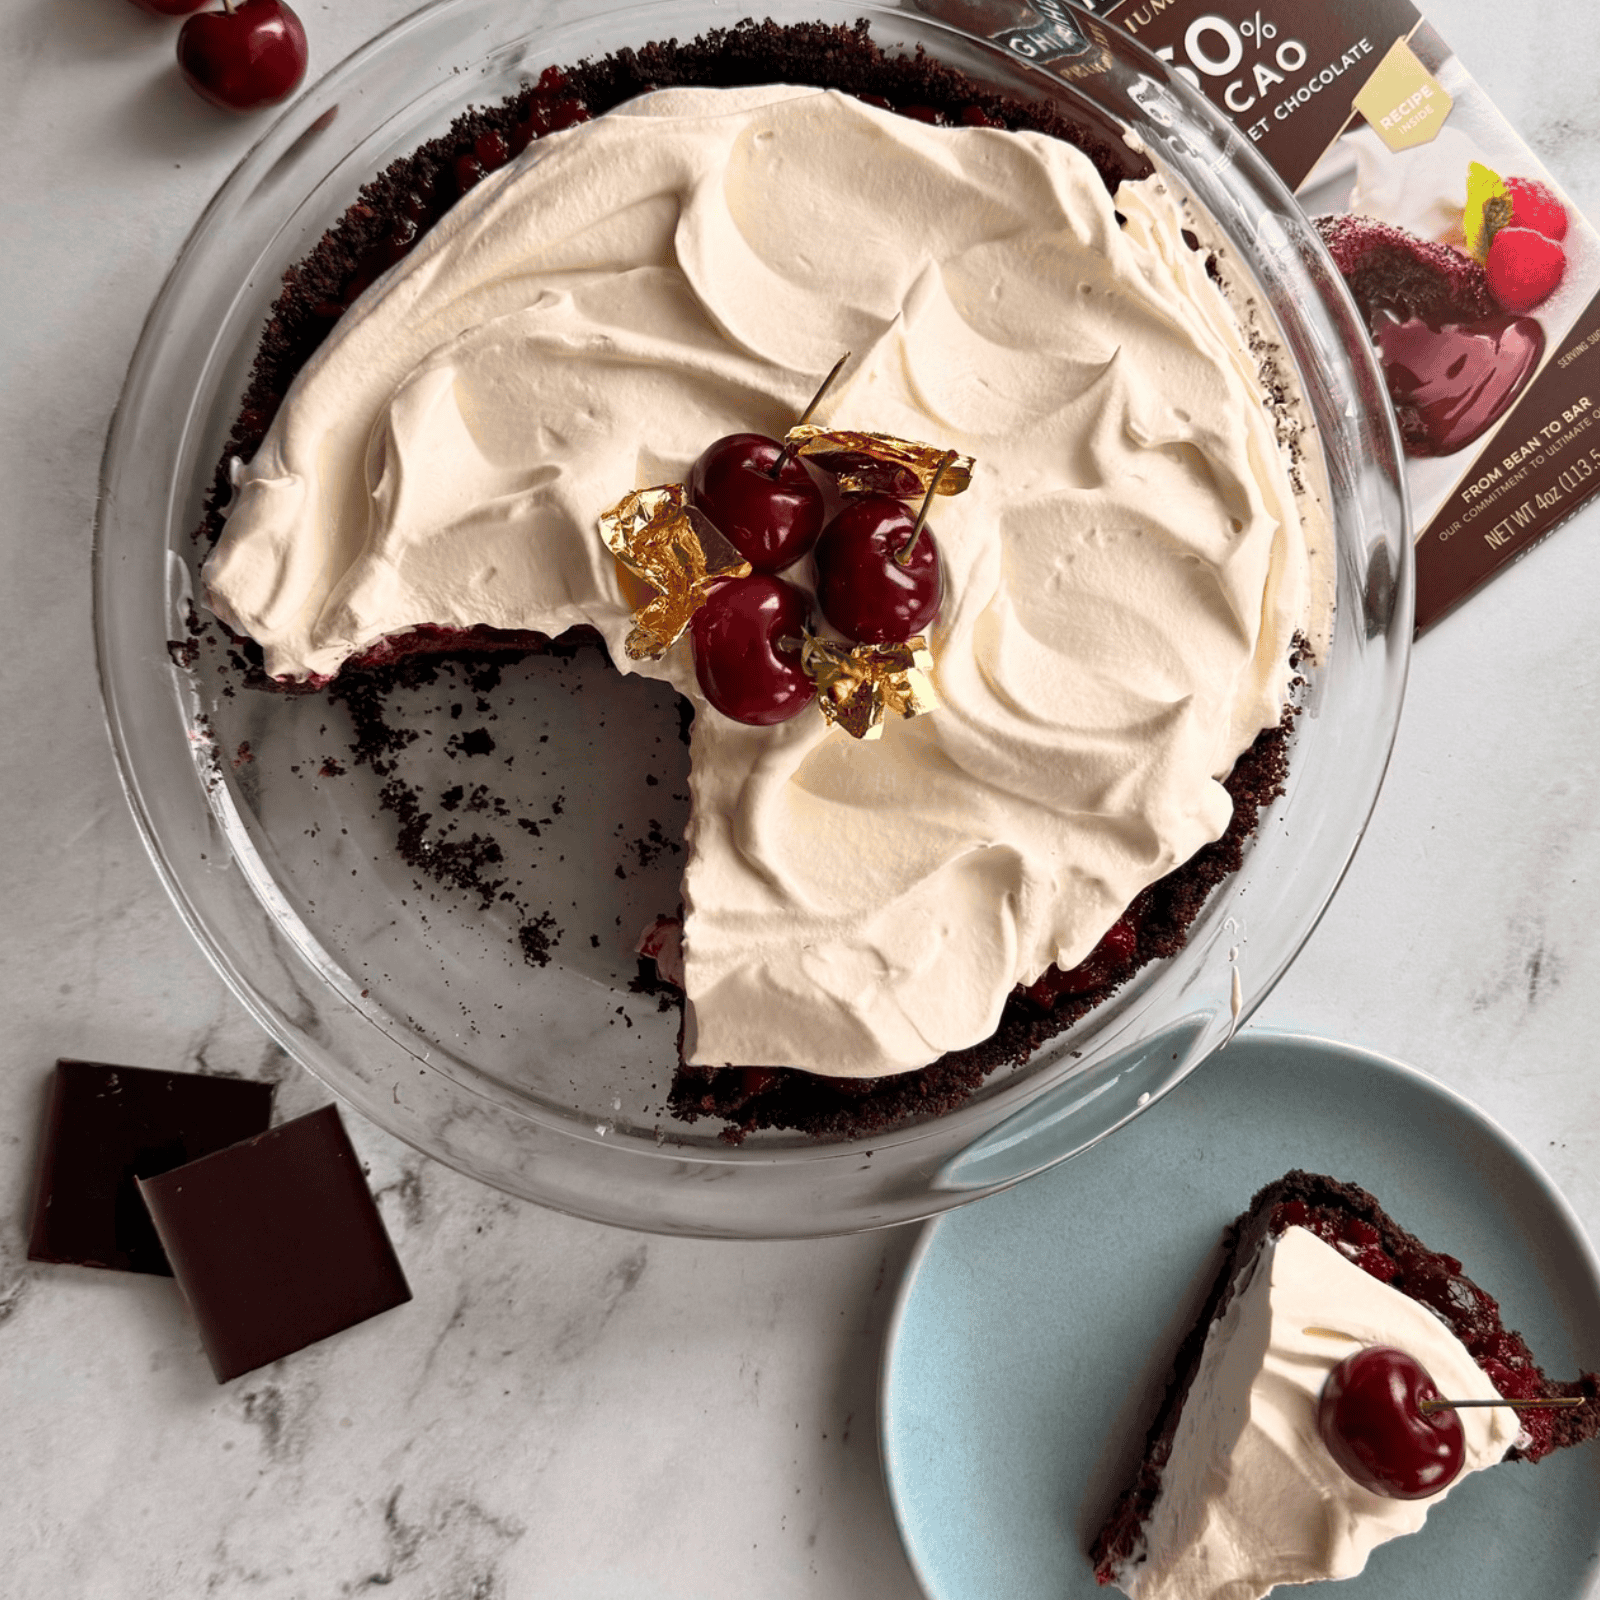
This Black Forest Pie is my new favorite Thanksgiving dessert of all time. And coming from this ‘traditional apple pie every year’ girl, that’s really saying something!
My husband actually came up with this idea last Thanksgiving! Black Forest Cake is one of his favorites, and after trying my Rich French Silk Pie, he pitched me a spin in that involving cherries and booze. And who am I to stand in the way of that kind of brilliance?
So, I created this pie. It all starts with a crisp homemade Oreo cookie crust, which gets filled with an impossibly creamy chocolate custard filling (easier and faster than the French Silk, which is a big bonus when you’re already making a fruit compote, too).
On top is a homemade cherry filling with a big splash of Kirsch liqueur, all topped with a generous cloud of lightly sweetened vanilla-spiked whipped cream.
It’s rich, chocolatey, and gloriously creamy. It has cherries, booze, and, perhaps most importantly when Thanksgiving rolls around and your oven is already fighting for its life, the crust is the only part of this pie that needs to be baked.
Even better? This pie is designed so it’s best if you make it the day before … so less to worry about on Thanksgiving morning!
It’s got all the comforting, recognizable elements of a great pie, but the combination of silky chocolate, bright cherries, a hint of Kirsch, and vanilla whipped cream makes it feel special enough for the biggest food holiday of the year.
And if your grandparents are the types of people that ONLY want to see ultra-traditional food on the Thanksgiving table … well, they’ll be in for a treat with these traditional flavors presented in an only-slightly-modernized way 😉

Why You’ll Love This Black Forest Pie:
- It’s a fun twist on a traditional Thanksgiving pie. Still pie. Still chocolate. Still fruit. Still accessible enough for people who think Thanksgiving dessert should involve absolutely zero surprises.
- The filling is ridiculously silky. The filling is rich, smooth, and basically like a fancied-up version of the best chocolate cream pie you’ve ever had.
- It won’t monopolize your oven. Only the Oreo crust is baked (and just for 10 minutes).
- It’s the perfect make-ahead dessert. The pie needs time to chill and set anyway, making it ideal for preparing the night before Thanksgiving or Friendsgiving.
- The flavors actually get time to settle in. Chocolate, cherries, Kirsch, vanilla… this is not a dessert that suffers from a little overnight beauty sleep.
What Is Black Forest Pie?
This pie takes its inspiration from Black Forest cake, the classic German dessert made with chocolate, cherries, and whipped cream … but instead of layers of chocolate cake, we’re bringing those flavors into pie form.
A chocolate cookie crust replaces the cake, a rich chocolate custard takes center stage, homemade cherry filling adds that essential fruity contrast, and everything gets finished with vanilla-spiked whipped cream.
The result is an obscenely decadent pie that everyone will be raving about for years to come.
The Ingredients You’ll Need:
- Oreos: The crust is made from Oreo crumbs and a little melted butter – but if you’re feeling like taking a shortcut, feel free to buy a store-bought Oreo crust. I won’t tell.
- Chocolate: Since we want a filling that is rich and chocolate-forward, we’re using bittersweet chocolate to keep things from getting too sweet.
- Eggs: Eggs are essential to that signature creamy, smooth pudding/custard texture. They help create a filling that’s decadent without being overly rich or cloying.
- Sugar: Just enough to sweeten lightly without overdoing it.
- Butter: A little butter gives the chocolate filling richness and contributes to that incredibly smooth, luxurious texture.
- Cornstarch: A little in both the chocolate and cherry layers ensure everything firms up slightly, without solidifying too much.
- Cherries: A homemade cherry filling gives this pie that unmistakable Black Forest flavor. You can use fresh or frozen, it doesn’t matter – just be sure to buy pitted cherries or pit them yourself before using.
- Kirsch: Kirsch gives the cherry filling a little extra depth and helps push the flavors firmly into Black Forest territory.
- Heavy Cream: Heavy cream gets whipped into a lightly sweetened topping that balances the richness perfectly.
- Vanilla: A little vanilla gives the whipped cream warmth and helps tie all those chocolate and cherry flavors together.
Can I Skip the Kirsch?
If you’re serving the pie to people who don’t consume alcohol, you can adapt the filling accordingly – but if you can use Kirsch, I highly recommend it. The flavor is absolutely worth it.

Science of Baking Moment: Temperature Matters Here
The Black Forest Pie filling needs to chill completely before topping and serving. In this chill time, the pie sets up perfectly so it slices beautifully, and prevents the whipped cream topping from sliding right off.
I prefer to make the pie crust and fillings the day before, giving it ample time to set, so I can just top it with whipped cream and serve the following day.
Tips for the Best Black Forest Pie
- Cool everything before layering: Warm are not our friends here, so ensure you take the time to let each part of this pie cool completely before adding the next layer.
- Make it ahead: Making this pie the night before gives the filling plenty of time to set and leaves you with one less thing competing for your time on Thanksgiving.
- Keep it chilled: Because of the dairy-rich ingredients, this pie should be stored in the refrigerator until you’re ready to serve it. Be sure to return any leftovers (if there are any!) to the fridge pronto, too.
Can You Make Black Forest Pie Ahead of Time?
Yes—and you absolutely should. This is one of my favorite things about this pie.
You can make the crust weeks in advance, if needed; simply cover well with plastic wrap and freeze. Thaw and bring back to room temp before filling.
The cherry layer can also be made a few days ahead of time, and stored inside an airtight container. Stir well before spreading across the cooled chocolate layer.
While the entire pie can be made ahead of time, the whipped cream will look and taste the best if added within a few hours of serving.
How Long Does Black Forest Pie Last & How to Store It
Store Black Forest Pie covered in the refrigerator for up to 3 days. Note that the crust will soften slightly as it sits.

Black Forest Pie Frequently Asked Questions
Is Black Forest Pie the Same as Black Forest Cake?
This pie is inspired by the flavors of Black Forest cake: chocolate, cherries, Kirsch, and whipped cream. Instead of cake layers, this pie uses a chocolate cookie crust and chocolate custard filling – but it’s still topped with a Kirsch-spiked cherry filling and whipped cream.
Does This Pie Beed to be Baked?
Only the Oreo crust gets baked here. The chocolate filling, cherry topping, and whipped cream don’t require additional baking, making this an excellent dessert when oven space is limited.
Can I Make Black Forest Pie Before Thanksgiving?
Absolutely. In fact, it’s best made ahead so the chocolate filling has plenty of time to chill and set.
What is Kirsch and What Does it Taste Like?
Kirsch is a clear cherry brandy with a distinctive cherry aroma and a slightly fruity, boozy flavor. In this pie, it adds depth to the cherry filling and gives it that classic Black Forest flavor.
Can I Make This Pie Without the Alcohol?
Yes. You can omit the Kirsch if necessary, though the flavor will be slightly less traditional. Depending on your recipe, you may want to replace the liquid with an appropriate non-alcoholic alternative, alcohol-free vanilla, or water.
More Thanksgiving Recipes You’ll Love:
- Homemade Apple Pie – pairs perfectly with this pie!
- Homemade Banoffee Pie – if more fruit is your jam
- Sourdough Discard Cornbread – the best side dish
- Gougères Recipe – the best appetizer

Black Forest Pie
Ingredients
For the Crust:
- 250 grams (18 whole) Oreos, don't remove the filling
- 42 grams (3 Tablespoons) unsalted butter, melted
For the Chocolate Filling:
- 228 grams (½ cup) whole milk
- 120 grams (½ cup) heavy cream
- 142 grams (5 ounces) bittersweet chocolate baking bars*, finely chopped
- 100 grams (½ cup) grams granulated sugar
- 21 grams (3 Tablespoons) cornstarch
- ¼ teaspoon salt
- 3 large egg yolks, separated while cold then brought to room temp
- 28 grams (2 Tablespoons) unsalted butter, at room temperature
- 8 grams (2 teaspoons) vanilla extract
For the Cherry Filling:
- 480 grams (3 cups) cherries, pitted, fresh or frozen
- 36 grams (3 Tablespoons) Kirsch liqueur
- 25 grams (2 Tablespoons) granulated sugar
- 2 Tablespoons cornstarch
For the Whipped Cream Topping:
- 360 grams (1 ½ cups) heavy cream
- 12 grams (3 Tablespoons) powdered sugar
- 12 grams (1 Tablespoon) vanilla extract
Instructions
Make the Crust:
- Preheat oven to 350°F / 175°C. In the bowl of a food processor, place the Oreos. Pulse until fine crumbs form. Add the melted butter and pulse until combined. Press into a 9-inch pie pan and bake for 12 minutes, or until set. Set aside to cool completely.
Make the Filling:
- In a large saucepan, place the milk and cream. Bring just to a simmer and immediately remove from heat. Add the chopped chocolate and stir until the chocolate has completely melted and the mixture is smooth. Place back on the lowest heat and keep warm.
- In a large bowl, place the granulated sugar, cornstarch, and salt. Whisk to combine. Add the egg yolks and whisk to combine.
- Add about ¼ of the hot chocolate mixture and whisk well to temper the eggs. Add the chocolate-egg mixture to the saucepan over medium-low heat. Stir almost constantly with a heatproof silicone spatula, cooking until the mixture thickens and large bubbles begin to break on the surface. This typically takes me about 2-3 minutes. Remove from the heat.
- Add the butter and vanilla and stir to combine.
- Strain the mixture through a fine mesh sieve directly into the prepared, cooled pie crust, spreading evenly. Place plastic wrap directly on the surface of the chocolate layer, then set it on a heatproof trivet in the fridge for at least one hour or overnight.
Make the Cherry Filling:
- Place the pitted cherries (no need to thaw if frozen), Kirsch, sugar, and cornstarch in a large heavy-bottomed saucepan over medium heat. Stirring frequently, cook the cherry mixture until it begins to thicken and coats the back of a spoon, about 10 minutes. I like to use my spatula or spoon to break up the cherries, to ensure they're slightly but not completely mashed. Remove from heat and allow to cool completely.
- Once the cherry mixture has cooled, gently spread across the top of the chocolate filling. Cover well and allow to chill for at least an hour or until cold (rushing this could result in the whipped cream sliding off).
Top and Finish the Pie:
- In a large, deep bowl (or the tall jug that comes with an immersion blender), place the heavy cream, powdered sugar, and vanilla extract. Whip the heavy cream to medium peaks (a little firmer than soft peaks but not as firm as stiff peaks).
- Use a spatula to smooth the whipped cream across the top of the pie, stopping about half an inch from the edge for prettiest appearance. Finish with chocolate curls or fresh cherries. Serve, or store chilled for a few hours before serving.