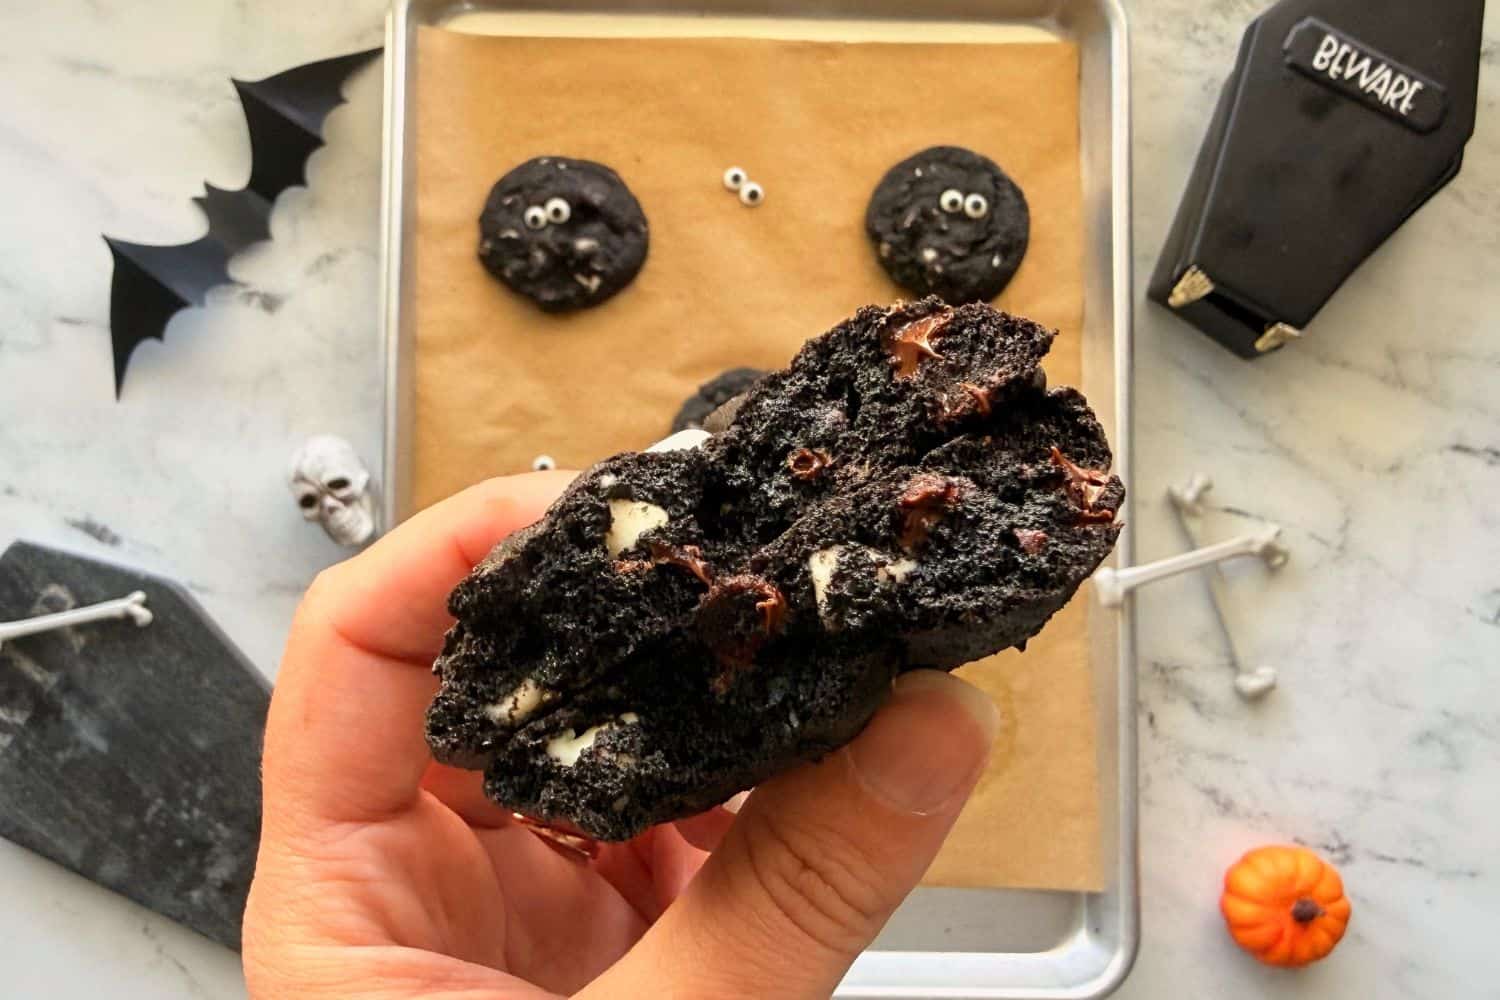
These Halloween Cookies are perfect for Halloween parties because they’re quick and easy to make and are always a hit with everyone who tries them!
I knew I wanted to create an easy cookie recipe to go with my yearly rewatch of Brooklyn Nine-Nine’s Halloween Heist episodes, and I LOVE cookies made with black cocoa, so I went to the kitchen to create something to fit the bill.
After a couple of tests and lots of taste-tester feedback, I was so happy with these results!
The cookies are perfectly thick and a little chewy – my favorite! The black cocoa brings the perfect amounts of spooky + delicious. And you can customize the mix-ins with whatever you have on hand!
So whip up a batch of these easy Halloween Cookies for your party or rewatch party, and enjoy! (and if you’re interested in WHY these cookies are so wonderfully thick, learn more about how to make thick cookies here!)

Do I Have to Use Black Cocoa?
I’m sure these cookies will work just fine with any cocoa powder you have on hand, but I haven’t tested that out to know for sure. Once you try black cocoa, you’ll fall in love! If you’re an Oreo fan, black cocoa is what gives Oreos their distinctive color and flavor. It can be hard to find black cocoa in stores, but it’s easily available online here.
After you’ve tried these, since you already have black cocoa on hand, give my Chocolate Upside Down Cake a try!
Customizable Mix-Ins
I typically make these cookies using a 50/50 combination of semi-sweet and white chocolate chips. I have also used peanut butter chips and M&Ms. Use whatever you like here – just keep the total weight about 300 grams for best results.
Candy Eyeballs
I find candy eyeballs with the sprinkles, in the baking aisle of my grocery stores, or with the seasonal items at Walmart – but you can also grab them online here. I’ve also used the Halloween mix Walmart sells with little candy bones, tombstones, and eyeballs – so be as creative as you like here – or skip them if you can’t find them. Your cookies will still taste amazing!
Note: Feel free to pop the candy eyeballs or other decor on top right after the cookies come out of the oven. Some brands will melt slightly in the oven, so even though that fits the spooky vibes perfectly, it may bother some, so adding them immediately post-bake will alleviate this possibility.
Can I Add Salt on Top?
Sure! I love these cookies with a little sprinkle of flaky sea salt on top right before baking, so feel free to add some if you love the salty-sweet combo as much as I do.
Stuffed Halloween Cookies
Okay, I haven’t tried it for myself with this specific recipe, but I love the idea of freezing teaspoon-sized balls of Nutella or peanut butter and stuffing this dough with it! Freeze the spread in balls on a parchment-lined baking sheet until solid. Then when you’re portioning out your dough balls, flatten each ball with your palm and pop a frozen ball of spread inside. Gently wrap the dough around the spread, sealing it up, and bake as directed below. Is your mouth watering yet?
Do I Have to Use Espresso Powder?
Nope, it’s entirely optional. I enjoy the depth of flavor espresso powder brings to these cookies, but you can skip it entirely if you don’t like coffee or don’t have any on hand – no substitution necessary.
Can I Make Halloween Cookies Ahead of Time?
Yes! The portioned Halloween Cookie dough will keep for 3 days if stored in the fridge, inside an airtight container or Ziploc bag. Before baking, press the dough balls down to about 1″ thick (so they spread evenly), then bake as directed below.
If you need to prep the dough more than 3 days ahead, I recommend freezing the portioned dough. Simply thaw in the fridge overnight, press the dough balls down slightly (about 1″ thick), and bake as directed below.

More Easy Cookie Recipes:

Halloween Cookies
Ingredients
- 113 grams (1 stick) unsalted butter, at a cool room temperature (about 65°F / 18°C)
- 150 grams (¾ cup) granulated sugar
- 1 large egg + an extra yolk, separated when cold then brought to room temp
- 1 Tablespoon vanilla extract
- 160 grams (1 ¼ cup) all-purpose flour
- 43 grams (½ cup) black cocoa powder
- 8 grams (1 Tablespoon) cornstarch
- ¼ teaspoon salt
- ½ teaspoon baking soda
- ¼ teaspoon baking powder
- ½ teaspoon espresso powder, optional
- 300 grams 1 1/2 cups chocolate chips, I like half semi-sweet and half white chocolate
- Candy eyeballs
Instructions
- Preheat oven to 350°F / 176°C. Prepare two large light-colored baking trays with parchment paper. Set aside.
- In a large bowl, cream together the butter and sugar using an electric mixer on medium speed. Mix until light and fluffy, about 3 minutes. Scrape down the bottom and sides of the mixing bowl.
- Add the egg, egg yolk, and vanilla. Beat until combined, about 1 minute. Scrape the bowl down again.
- Add the flour, cocoa powder, cornstarch, salt, baking soda, baking powder, and espresso powder (if using). Mix on low until almost combined. Scrape down the mixer, ensuring the very bottom of the bowl is incorporated.
- Add the chocolate chips (or whatever mix-ins you like) and mix until just combined. Do not overmix.
- Using a large 3-Tablespoon cookie scoop, portion mixture and place on prepared baking sheets, spacing at least a couple inches apart. Place as many candy eyeballs as you like on top of the dough balls, pressing gently to adhere.
- Bake 10-12 minutes, or until your cookies are puffed, set at the edges, and no longer look wet in the middle (a little damp is okay). Allow to cool on baking sheets for a a few minutes before transferring to a wire rack to cool completely.
- Baked, cooled cookies can be stored inside an airtight container at room temperature for about 3 days.