This Homemade Buttery Pie Crust comes together quickly and makes delicious, flaky pastry that’s easy to work with.
I love to use this Pie Crust in summer for homemade peach or blueberry pie, and especially in the Fall for my scrumptious Apple Pie.
I love that this recipe uses a food processor, so it only takes a few minutes to prepare. It’s then going to hang out in the fridge overnight, allowing the flour to hydrate and the gluten to relax, so it rolls out like a dream the next day.
I use this recipe every year to make my Thanksgiving pies, always prepping them ahead of time for the easiest baking on the day.

Easy Homemade Pie Crust Tips
- Weigh your flour. I don’t even provide cup measurements because it’s so important to be accurate here. Incorporating excess flour will cause dry, flavorless pie crusts that are hard to roll out, don’t flake nicely in the oven, and are weirdly chewy to eat.
- Keep everything cold. This is SO important when making pies. Keep your butter, vodka, and water as cold as possible, for the best texture and easiest handling of the dough.
- Only use as much water as needed. More on this below.
Why Use Vodka in Pie Crusts?
This is a tip I picked up from New York Times Cooking years and years ago. Various high-profile chefs like J. Kenji Lopez-Alt and Christopher Kimball swear by using vodka in pie crusts, and I agree! Vodka evaporates in the hot oven, doesn’t impart any flavor, and helps prevent gluten development for a flakier pie crust.
Don’t want to use vodka? That’s okay – just use more ice water instead.
The Sugar
I like to include a little sugar in my pie crusts for flavor, texture, and to assist with browning. I typically use regular granulated sugar, but light brown sugar works too and adds a hint more flavor to the crust, so feel free to use whichever you prefer.
The Butter
This is an all-butter pie crust. I don’t personally prefer the flavor shortening brings to a pie crust – but if you prefer to use it, I recommend going with a 50/50 split of butter and shortening. Be sure to use cold shortening and butter.
I also recommend using unsalted butter as I prefer to be in control of how salty my bakes are – but if you’re a salted butter fan, simply skip the salt in the recipe.
Why is There a Range of Water in the Recipe? The Water in Pie Dough
The amount of cold water needed will depend on your kitchen environment, the brand of flour used, and a bunch of other factors. I always use the same brand of flour, but because my kitchen’s humidity level fluctuates depending on the weather, I sometimes need much more water to bring the dough together.
The key is avoiding adding too much water, so be cautious and only add as much as needed to just bring it together. Start with less water than you think – just a couple tablespoons. As you begin to mix, drizzle a little more on the dry parts. As you laminate the dough (more on this just below), the dough will start to come together more, and the dry bits that remain should get incorporated.
What is Lamination? Why Laminate Pie Dough?
Lamination is essentially layering dough and fat (butter) for flakiness. Think about a croissant. You know how it’s flaky and you can see layers on the outside? That is because croissant dough is laminated before being shaped and baked.
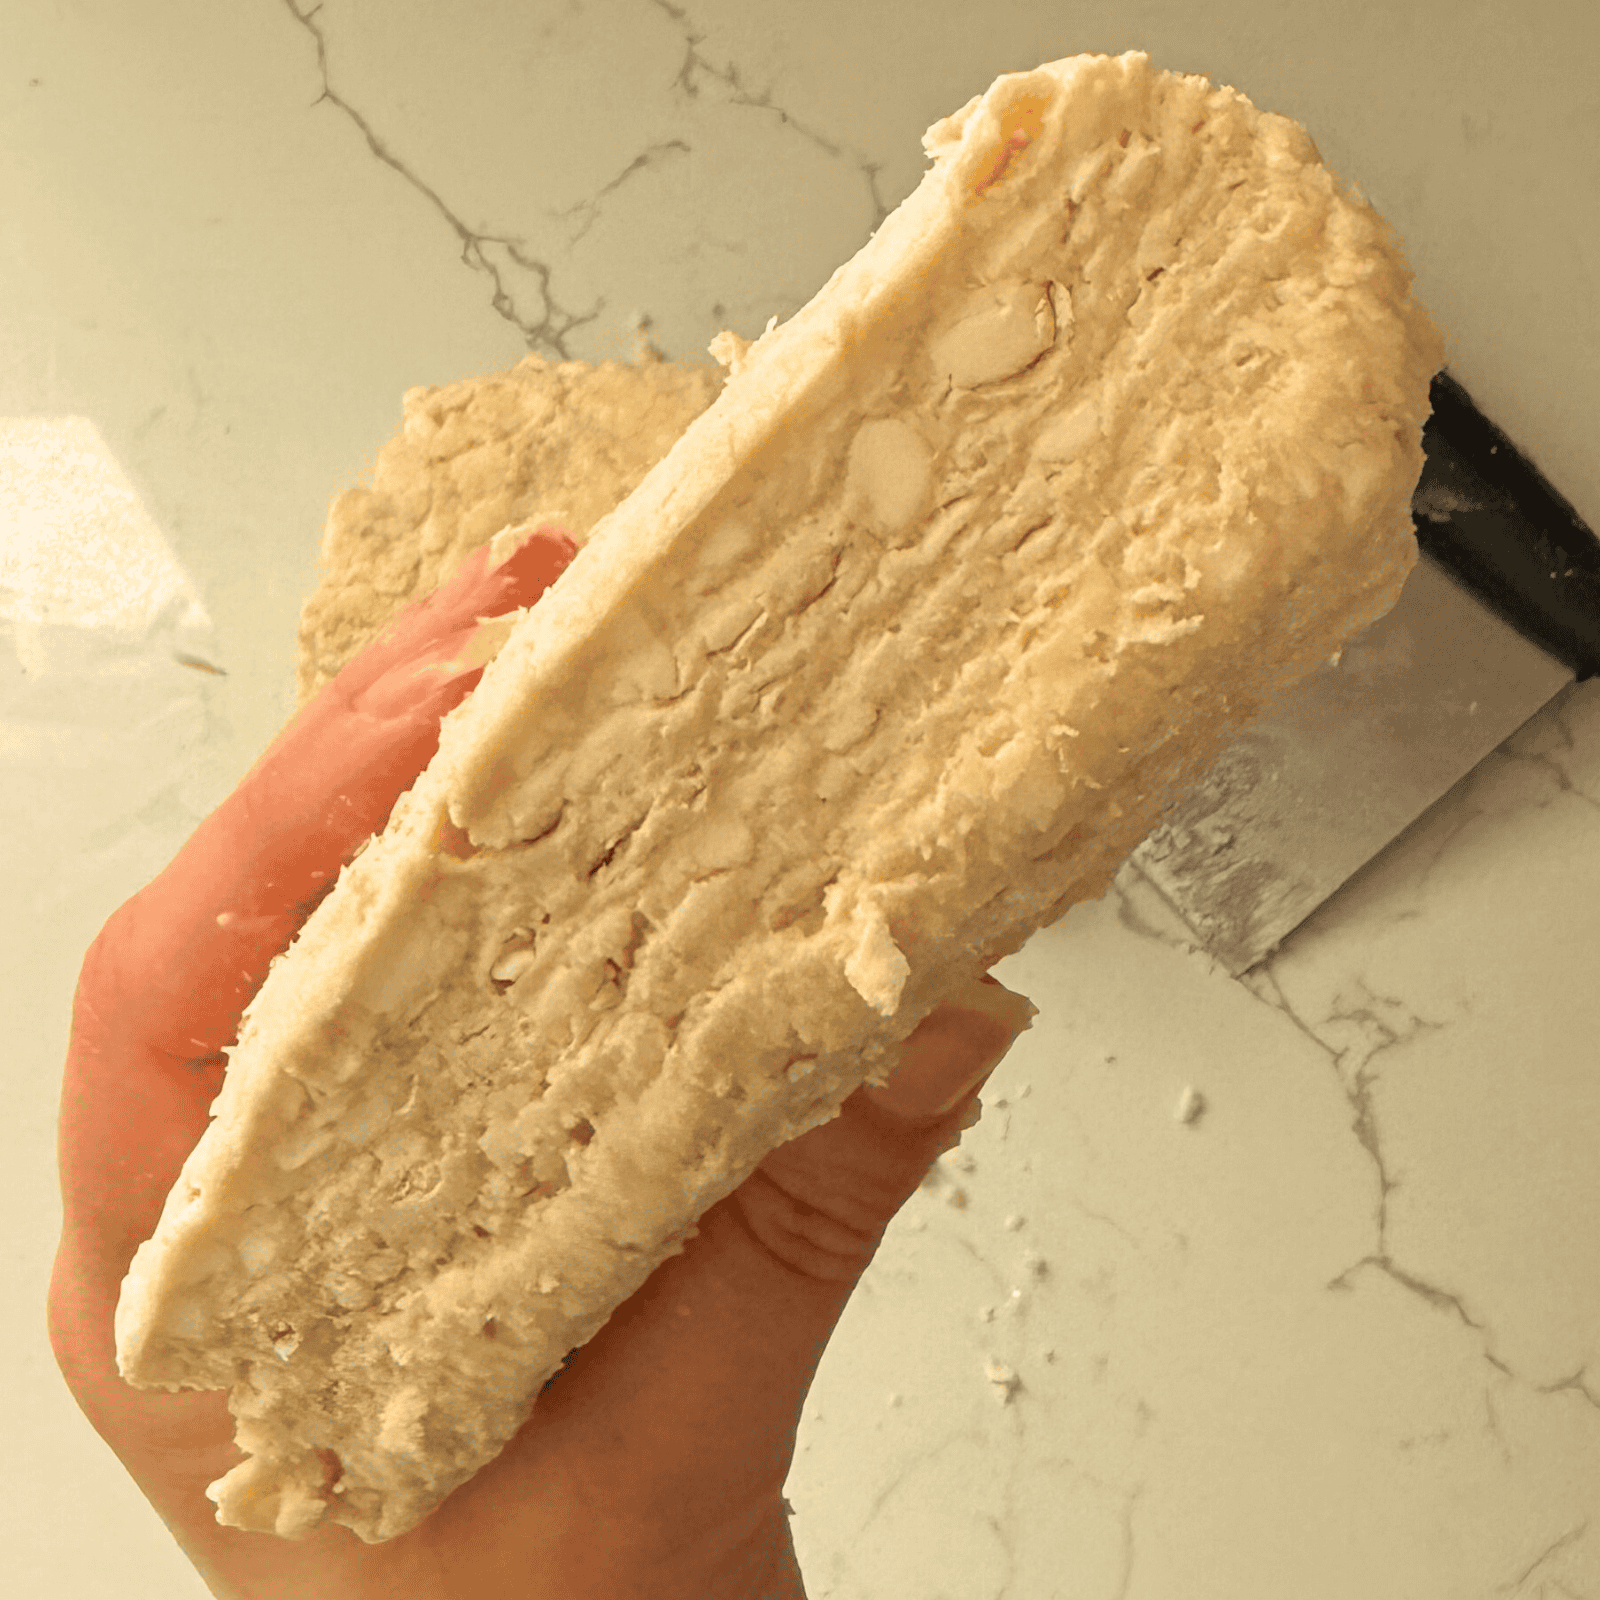
So, we’re borrowing that method (but simplifying it). Once our pie dough is mostly combined in the food processor, dump it out and shape it into a rectangle using your hands, then slice it in half and place one half on top of the other.
We are basically creating layers of butter for flaky pastry, but also lightly kneading to incorporate the remaining dry pockets without over-mixing or melting our butter. This creates the best texture so it’s easy to handle, and enjoyable to eat.
Do I Have to Chill the Dough Before Rolling?
Yes. Giving the dough time to chill in the fridge allows the gluten to relax and allows the flour to hydrate, so it won’t snap back as you roll it out and preventing it from shrinking in the oven.
We then chill the rolled-out dough again before baking, to further prevent shrinking as the pie bakes, and to keep the butter cold, creating the best flaky crust.
Tools for Making Homemade Pie Crusts:
- Food Processor. I like to use my food processor fitted with the S-blade (the kind of flat blade that vaguely resembles an ‘S’ when you look at it from the top. It’s the standard food processor blade). This allows you to make the pie dough in just a few minutes, skipping the elbow grease, and allowing the ingredients to stay cold without the warmth of your hands interfering.
- Bench scraper. This is one of my most-used tools in the kitchen, and is so helpful here. I use it to bring the dough together once it’s transferred from the bowl of the food processor to your workbench, and to laminate the dough. This is the bench scraper I have.
Help, I Don’t Have a Food Processor!
That’s okay! You can still make this pie dough without a food processor. Simply mix the flour, sugar, and salt together in a large bowl, then cut in the butter using a pastry blender (which helps keep the dough cold and prevents your warm hands from melting the butter). You can use a spatula or a wooden spoon to bring the dough together once the liquid is added. I still recommend laminating the dough as explained in the recipe.

More Cozy Bakes You’ll Love:
- Homemade Apple Pie – the perfect filling for this pie crust!
- Cinnamon Roll Blondies
- Bourbon Turtle Brownies
- Apple Crisp Bars

Homemade Buttery Pie Crust
Ingredients
- 300 grams all-purpose flour
- 25 grams sugar , granulated or light brown
- 1 teaspoon fine sea salt
- 285 grams (2½ sticks) unsalted butter, cut into small pieces
- 55 grams vodka, ice cold
- 60-120 grams water, ice cold
Instructions
Make the Dough:
- Measure out all your ingredients before beginning. This means you can work quickly and prevent the butter from softening. I like to place the cubed butter in the freezer while I prep everything else.
- Place the all-purpose flour, sugar, and salt in the bowl of a food processor fitted with the S-blade attachment. Pulse a couple times to combine.
- Add the cold, cubed butter all at once. Pulse a few times, until the butter is somewhere between the size of peas and coarse sand. The finer the butter, the easier the dough will be to work with – but larger butter chunks means flakier pastry.
- Add the cold vodka and two tablespoons of ice water. Pulse to combine. Drizzle in another tablespoon or two of water, pulsing until the mixture starts to hold together but some of the dough still looks sandy.
Laminate:
- Tip the dough onto a clean work surface and carefully remove the blade. Using your hands, press the dough into a rectangle, about 4×7 inches / 10x18cm (does not have to be perfect).
- Using a bench scraper (or a knife), cut the dough in half and place one half on top of the other. Press the dough out into a similarly-sized rectangle, incorporating any bits of dough and flour around the dough.
- Repeat 3-5 times until the dough holds together cohesively. Wrap the dough well in plastic wrap and place in the fridge for at least 2 hours but preferably overnight.
Roll out the Dough:
- Once the dough has chilled, cut the dough in half and return one half to the fridge. On a lightly-floured surface, roll the dough out, using your pie pan as a guide for size. The dough needs to be about 3 inches / 7.5cm larger than the pan's base, so it can come up the sides and allow for crust crimping.
- Rotate the dough with each pass of the rolling pin to prevent sticking and ensure even thickness, adding a little more flour to the work surface and rolling pin as needed.
- Once the dough reaches the correct size, carefully pick it up and place in the pie tin. Gently encourage the dough into the pan's base and up its sides. Do not stretch the dough at any point. Trim off excess beyond 1 inch / 2.5cm over the edge the pan. Place plastic wrap over the top and return to the fridge for 1 hour.
- Roll out the top crust as desired. I like to make a lattice pattern and use the excess dough for decorations such as small leaves – but you can simply roll it into one large top crust, if preferred. Cover with plastic wrap and chill.
- At this point, pie crusts can be covered well with plastic wrap and foil and frozen for later filling and baking for up to 1 month – or filled with any pie filling you like. Follow the pie recipe's instructions for baking.