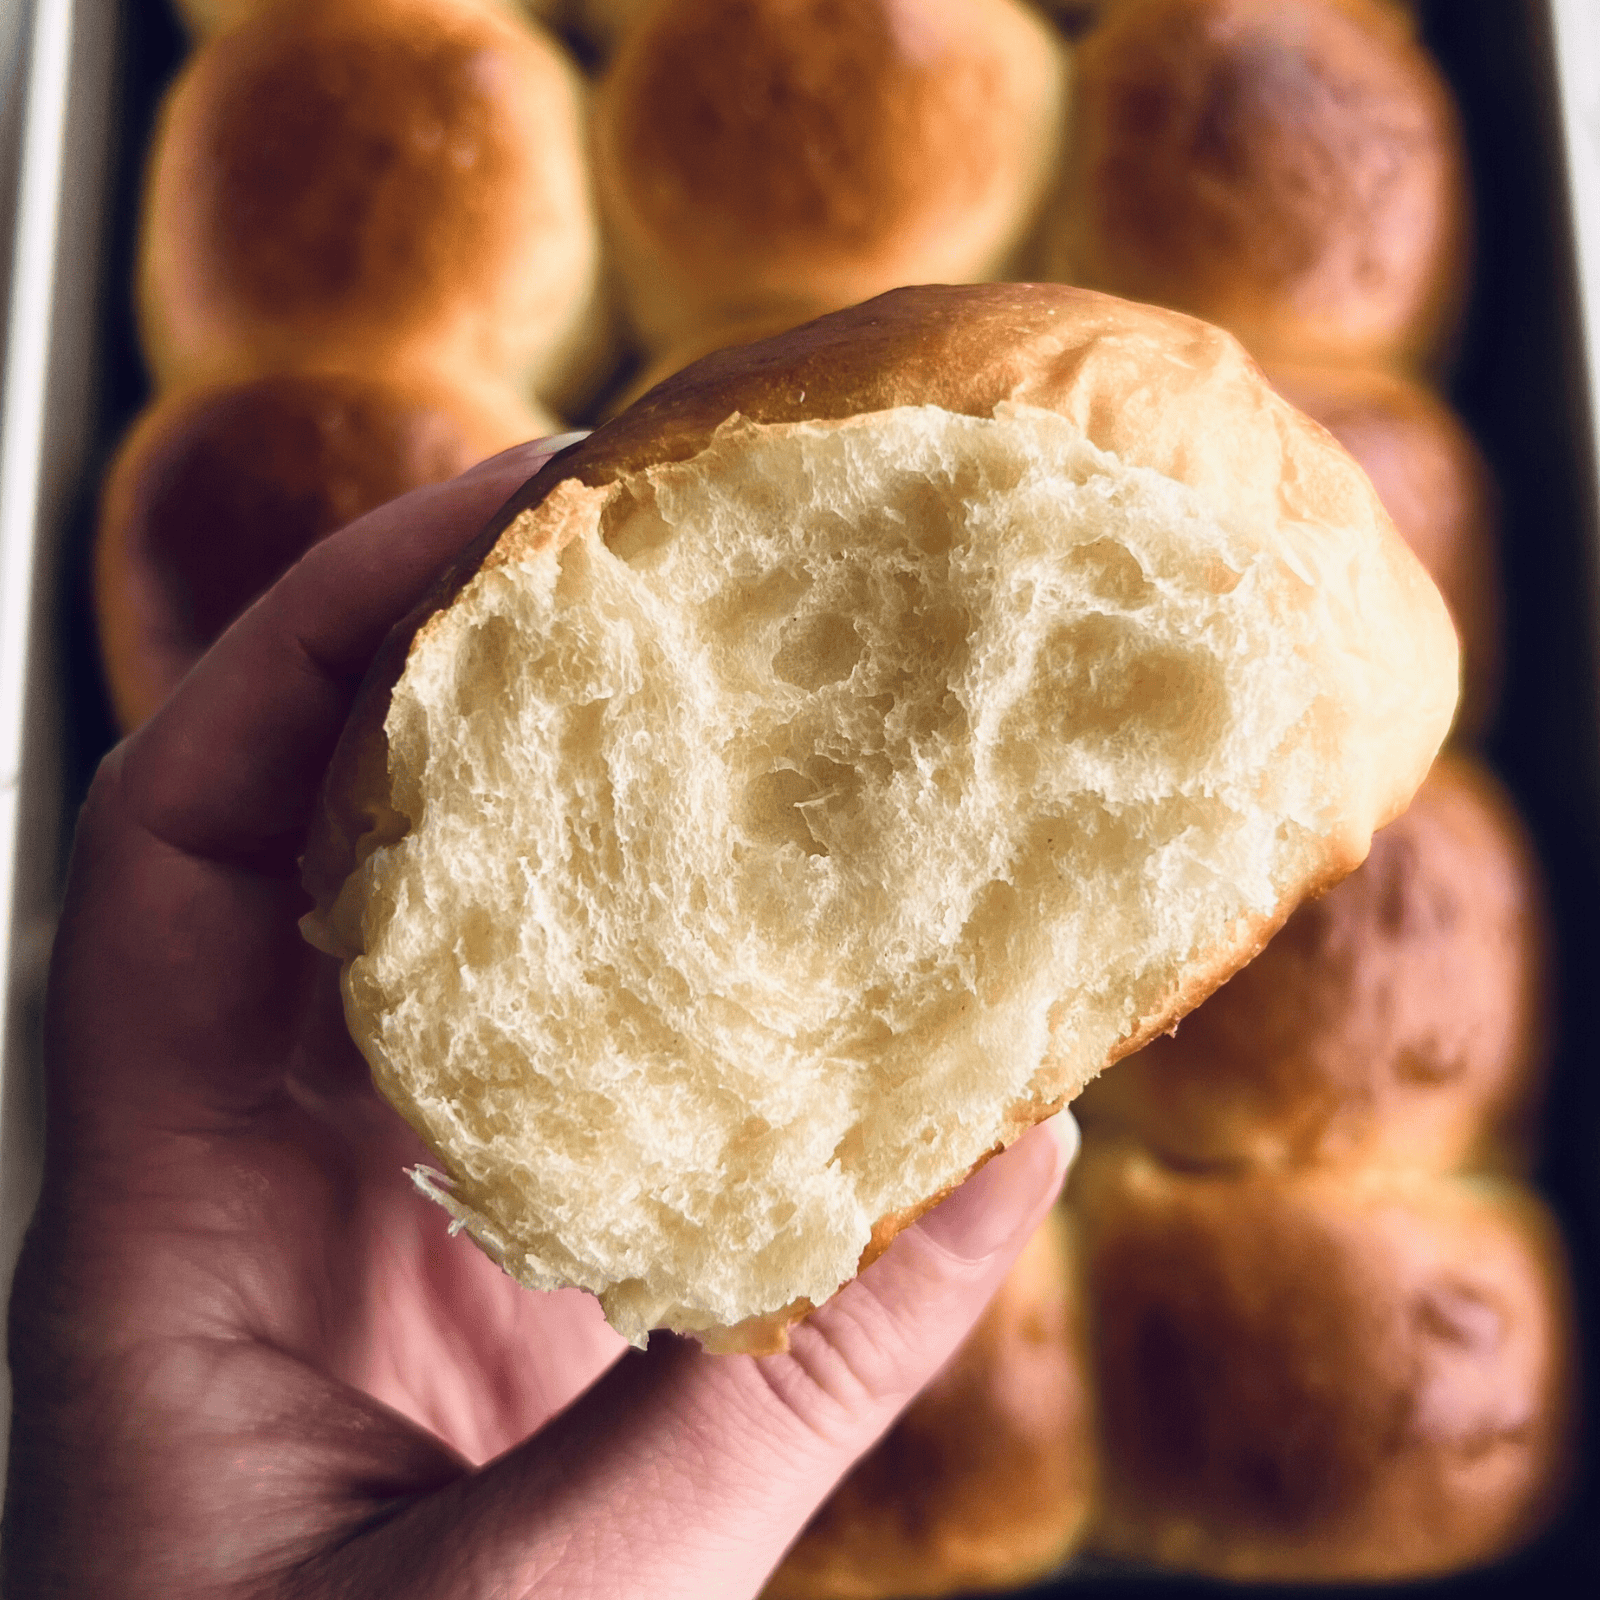
These Homemade Hawaiian Rolls are the #1 most requested recipe from my entire extended family.
The soft, squishy, slightly sweet, satisfyingly pull-apart clouds are one of the side dishes my family and friends request time and time again for every Thanksgiving, Friendsgiving, Easter, or regular Sunday dinner.
If you’ve only ever bought the store-bought version, these copycat Hawaiian Rolls will ruin you! They’re softer, moister, and have a rich, buttery depth that the store-bought version just can’t compete with. And the texture? Pillow-level plush perfection.
I’ve made these rolls dozens of times over the past few years, after testing about a dozen times to perfect the recipe. I’m obsessed with bread and these babies are SO good I’d honestly be happy to eat them every day of the week.
These sweet dinner rolls are enriched with butter, eggs, and pineapple juice for that signature Hawaiian Roll flavor and tender crumb. They bake up golden on top, impossibly soft inside, and pull apart in the most satisfying way.
Everyone will LOVE these rolls, I promise! They’re perfect for sliders, holiday dinners, ham & cheese sandwiches, or just… eating five in a row. I’ve done it myself 😉

What Makes These Better Than Store-Bought Hawaiian Rolls?
- Rich butter flavor
- No preservatives or weird mystery ingredients
- Soft, moist crumb
- Heavenly aroma that makes your house smell like a bakery
- Sweet, but not dessert-level sweet
- Beautifully light and fluffy
Baking Science Moment: Why Homemade Hawaiian Rolls Are So Soft
This is an enriched dough, meaning it contains fat, sugar, and eggs. Those ingredients dramatically change how gluten develops and how the bread rolls bake. The key ingredients here are:
- Pineapple Juice: Adds subtle sweetness and that classic Hawaiian Roll flavor. Its acidity slightly lowers the dough’s pH, which helps tenderize the crumb. Don’t worry — the flavor isn’t “pineapple-y.” It’s just soft, lightly tropical sweetness. Don’t use fresh pineapple juice here – it works differently on a chemical level and can prevent the rolls from rising.
- Butter: Coats flour proteins, limiting gluten formation. Less gluten = softer rolls. But we still want structure, which is why proper kneading, proper shaping, and bread flour are key (more on these things below).
- Eggs: Eggs add fat and protein for structure and richness, giving the rolls extra moisture, better structure, and a slight chewiness.
- Sugar: Sugar does SO much more than providing sweetness! Sugar creates a beautifully moist roll with a tall, soft structure, and helps create that perfectly golden brown exterior. Don’t reduce the sugar!
Bread Flour + All-Purpose Flour for the Perfect Structure
Bread flour is important here because, as discussed above, this dough is enriched and soft, so it needs the extra protein to support that fluffy rise. Then we also use a little all-purpose flour to keep the rolls soft and squishy.
I do not recommend altering the ratios of flours, and do not use just all-purpose flour here. The ratio of both flours as written in the recipe will yield the perfect structure, promise.
Kneading Hawaiian Rolls
This is important! Knead the Hawaiian Roll dough until smooth, elastic, and slightly tacky. It should pass the windowpane test (where you can gently stretch a piece of the dough thin enough to see light through it, without the dough tearing).
Because this dough is rich, it may take a little longer to develop gluten. Be patient — this is what creates that iconic soft-but-structured texture.
How to Shape Hawaiian Rolls
This is vital for tall, pull-apart rolls. Here’s how:
- Divide the dough into 15 pieces. I like to use a bench scraper and a digital scale for this.
- Use your fingers to bring the edges each piece of dough into the middle, then use your countertop to roll into a tight ball. The tighter, the better here.
- Don’t flour the countertop; you want to be able to create tension as you shape and roll.
- This is a great video for how to shape rolls if you’re a visual learner!
Rising Times
Rising times will vary depending on the temperature and humidity level of your kitchen, so use the timings outlined in the recipe below as guidelines only – the visual cues are much more important here.
Basically, the hotter and/or more humid your kitchen is, the shorter the rising time will be (maybe shorter than what’s estimated below) and the colder and/or less humid your kitchen is, the longer your rolls will take to rise (longer than what’s written below).
My Pro Tips for Ultra-Fluffy Rolls
- Use warm, not hot, liquids. Around 100–110°F is perfect. Too hot and the heat will render the yeast useless; too cold and the dough will take forever to rise.
- Don’t rush the knead. Enriched dough needs proper gluten development to rise well. Be sure the dough passes the windowpane test before calling it.
- Weigh your flour. Too much flour = dense rolls. More on this just below.
Kiersten’s #1 Tip: Don’t Add More Flour!
This is the main spot where people mess up. This dough should be slightly sticky. As mentioned above, we’re using a bunch of ingredients that help make the rolls soft and delicious, but these ingredients can cause the dough to be a bit sticky.
I promise, it’s not worth adding extra flour to make the dough less tacky. Resist the urge!! Extra flour will create a dense roll instead of the fluffy, soft, light roll we want here.
If you live somewhere SUPER humid, add up to 2 Tablespoons (16 grams) of flour – but no more than that.
But Kiersten … the Dough is Too Sticky! How do I Shape it?
Simple: wet your hands slightly. Damp hands will more easily handle the dough for shaping. Just don’t wet them too much as that will prevent proper shaping.
How to Store Homemade Hawaiian Rolls
Store completely-cooled Hawaiian Rolls at room temperature inside an airtight container for about 3 days. Rewarm in a low oven wrapped in foil for that fresh-baked feel.
Freeze baked, cooled rolls inside an airtight container for up to 3 months. Thaw before reheating and serving.

Frequently Asked Questions for Hawaiian Rolls
What do I do if my Dough is Too Sticky?
Resist the urge to add more flour! More flour will create drier, denser rolls. To combat the stickiness, simply dampen your hands. Damp hands will more easily handle the dough for shaping. Just don’t wet them too much; that will prevent proper shaping.
My Rolls Didn’t Rise! Why?
This could be due to a few things:
1. Your yeast was inactive. This could be from expired yeast, or your liquids were too hot. Next time, use fresh instant yeast, and be sure liquids 100-110°F / 38-43°C (lukewarm) when adding to the dough.
2. Improper shaping. You want the rolls to be tightly shaped into balls. Here’s a helpful video for how to shape rolls.
3. Over or under-proofing. If your rolls were over-proofed, they probably look sad and deflated, so proof for less time next time. If they’re under-proofed, they might be dense and tight. Before baking, do the ‘poke test’ (gently poke a roll before baking. If the indentation bounces back right away, they’re not proofed yet. If it slowlyyyy springs back, they’re ready to bake).
4. Ingredient alterations. If you used only all-purpose flour, or altered the ratios of ingredients, that can ruin the rolls.
Do I Have to Use Bread Flour? Can I Use Only All-Purpose Flour?
No. The ratio of both flours as written in the recipe is vital to the perfect rise and texture of these soft, tall, tender rolls.
Bread flour provides extra protein for a stable structure, and a little all-purpose flour helps keep the rolls soft and tender.
Do I Have to Use a Stand Mixer for Kneading?
No, but a stand mixer with a dough hook will make the easiest work of kneading. Feel free to give it a try by hand if needed, but note that kneading by hand will take a lot of elbow grease and probably a good 20-30 minutes.
More Side Dishes Your Family Will Love:

Homemade Hawaiian Rolls
Ingredients
- ½ cup (116 grams) whole milk
- 5 Tablespoons (71 grams) unsalted butter
- ½ cup (116 grams) canned pineapple juice, at room temperature
- 1 teaspoon vanilla extract
- 2 large eggs, at room temperature
- 6 Tablespoons (75 grams) granulated sugar
- 2 Tablespoons (25 grams) light brown sugar
- 2 ¼ teaspoons instant yeast
- 4 cups (520 grams) bread flour
- ¼ cup (33 grams) all-purpose flour
- 1 ½ teaspoons fine sea salt
To Finish:
- 1 large egg, at room temperature
- 1 Tablespoon (14 grams) butter, melted, for brushing on after baking
Instructions
- In a medium-sized microwave safe bow, heat the milk and butter together until melted. Stir to combine, and allow to cool until lukewarm – about 100-110°F / 38-43°C.
- In the bowl of a stand mixer, place the warm milk/butter mixture, pineapple juice, vanilla, granulated sugar, brown sugar, and 2 eggs. Whisk to combine.
- Add the yeast, bread flour, all-purpose flour, and salt. Place on your mixer, fitted with the dough hook Start mixing on low speed. Gradually increase the speed to medium-high. Knead for 10-15 minutes or until the dough is cohesive, soft, elastic, slightly sticky, and passes the windowpane test.
- Cover the bowl with plastic wrap and allow the dough to rise until doubled in size, about 1 ½ hours.
- Meanwhile, prepare a 9×13 inch baking pan by lightly coating with cooking spray or line with nonstick foil.
- Gently punch down the dough and transfer to a clean countertop (do not flour the work surface). Using a bench scraper and a digital scale, divide the dough into 15 equal pieces.
- Shape each dough piece into a tight ball by bringing all edges of the dough into the center, then rolling taught, using your countertop to create tension. Place in the prepared pan.
- In a small bowl, combine the remaining egg with one Tablespoon of water. Using a pastry brush, gently brush the egg wash all over each roll.
- Cover the pan with plastic wrap. Allow to rise again until the rolls have doubled in size, about 1 hour.
- While the rolls proof, preheat oven to 375°F / 190°C.
- Bake for 20 – 25 minutes or until golden brown on top. Immediately out of the oven, brush the rolls all over with melted butter. Allow to cool slightly before serving. Store leftovers in an airtight container for up to 3 days.